Showing posts with label Fabric. Show all posts

First Thought (Her)

Thursday, December 18, 2014

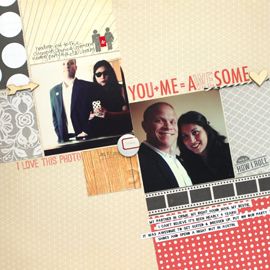
….and for your viewing pleasure the other half to First Thought (Him). I'm so glad I asked him this question. Apparently, he remembers me from before I remember him! I love that neither of us had a stellar first impression of the other. Although I was admittedly much nicer than he was!
This was another page I made using a prompt from Nicole Samuels' More Bright Ideas. I heat embossed white flowers onto my background and then watercolored over it. Then it was just a bunch of layers down the middle.
I also busted out one of my Studio Calico dies. This one is meant to be stitched. I loved the kraft with the white thread.
cheers & besos,

First Thought (Him)

Monday, December 15, 2014

Hiya! Remember that back log of projects I've been meaning to share? This is one of them. I made this waaaaaay back in the summer and am only just know sharing it here!
The idea for this page came about as I was listening to the Paperclipping Roundtable. They were chatting about Noell's Romantic Scrapbooking course and someone shared that they had scrapped about what they first thought of their husband. I thought I'd do the same with my boyfriend, Matt.
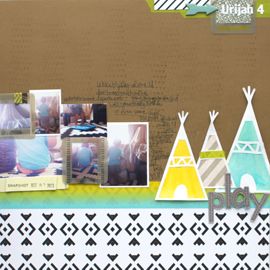
The design for the page is from a Simple Scrapper sketch that I turned into a cut file. I loved the triangles in it and knew I wanted to back them with paper.
I also decided to use fabric thanks to the More Bright Ideas class that Studio Calico ran earlier this year. (Did I mention I'm sharing this page really late??)

I made a corresponding page about What he First Thought of her. I'll share that in a few days!

cheers & besos,

Little Moments Layouts

Tuesday, November 4, 2014

Tada! Look what I made guys! Six layouts with the latest Scrapbook Circle kits. I used Little Moments, the main kit, and the Sweetness Add On for these. They were the perfect mix of fall festive and modern chic.

I'll be updating the blog throughout the month with more details about these pages. I've also decided this is going to be the month of Scrapbook Circle on the blog. I have plans to explain a bit more about the challenge schedule, the designers, my kit process and I have a bit of a RAK I'll chat more about next week.

cheers & besos,

December Album

Sunday, December 1, 2013

It's December! How is it December?! No seriously, where did the year go? They say the older you get the faster they go. That must be true bc I feel like I blinked and here we are nearly at the end of 2013.

December is one of my most favorite months of the year. I love Christmas and the holidays. The cold weather and twinkly lights. I love it a ton but don't do much to scrapbook it sadly. But this year, I'm determined to be better! Any scrapbooking is a good thing. Really ANY! So even if I only make one page, it already puts me in the accomplished category. 

I've had this cute lil handbook for a few years now. It was part of the 2011 Studio Calico December Daily kit. I decorated it back then (see it here) but was never happy with how it looked. So I re-did parts of it and am so much happier with the results.
I left the black and white chevron fabric paper. I LOVE black and white and this one is fabulous and modern. Paired with a green bow in a most fabulous shade, I think it looks lovely.
I cut a design with my silhouette and use it as a stencil to add some molding paste for a truly fabulous texture. The cardstock I used was red and it bled a bit when I applied the paste. But I like the subtle color it adds. And if one day I don't like it, I can give the whole thing a coat of white paint.

Thank you Wilna for teaching this technique in Art Class Vol. 1! (I'm so behind on classes that I won't let myself buy Vol. 2 until I've worked my way through my backlog) This was by far and away my most favorite chapter. This stuff is just so cool!
Here's a few views of the edges. It's one of the original things I did to decorate this book. I loved the idea of just the simple red line around the whole album.
And here's a look at the inside. It's painted with Martha Stewart Glitter paint. I like the paint but it coats really thin. You're looking at at least 5 coats! But the shimmer is just so fabulous.
You see, I loved parts of this album design before. And now that I've re-worked the cover. I love the whole thing! I can't wait to start adding pages to this (now) gorgeous lil mini.

It's December =) Hooray!!

cheers & besos,

Peas & Carrots

Tuesday, September 17, 2013

I scrapbooked! And man did it feel good. I've been working on pocket pages for Project 12 and Week in the Life. But those take me soo much longer! I feel like they require much more planning & printing & photo editing. Basically, they aren't my strength, which is why it takes me twice as long.

So today, I decided to scrapbook. As in make a layout. 
   
I've been watching my Big Picture Classes videos & reading my handouts for Hello Story and Art + Science. They had me itching to jump into the Art + Science prompts and back into Hello Story. And of course, after taking Jill's Scrapbooking from the Soul class, my journaling has forever changed.
This page is a conglomeration of a few prompts. First, its for the right brained process challenge from Art + Science. Which was to think of a story I wanted to tell, find photos and discover the title & journaling. 

This was a bit of a challenge, which surprised me. The creative bit wasn't a challenge, but rethinking the order of things definitely was (i.e. the process...hence the challenge!). Originally I had a different title in mind. I kind of couldn't help myself! But the further into the process, my journaling & title evolved into something different.
Another part of this challenge was to include a pocket. I tucked some ephemera, a journaling card and typed notes into a vellum pocket I stitched directly to the cardstock.

Here's the view of everything pulled out from the pocket a bit.
I had a lot to say about these photos. So much, I included 3 different journaling spots!

I originally stapled a bit of scrap cardstock to the receipt, just to add stability. But it ended up being home for journaling about this past Saturday and how mama & I love to visit Hobby Lobby together. And how we bought a bunch of stuff to make a project.

Note how messy my handwriting is for this bit. I "wasn't on my best behavior" so to speak. I knew it wasn't going to mess up the design since it was in the pocket, so I just wrote. Didn't worry about the spelling, not so much the grammar either, just a stream of consciousness.
I loved this patterned paper with the page. I unearthed it from my scrap pile and thought the colors worked well with this fall-esque themed page. But knew it would be too busy to print my journaling on and I didn't really want to cover it with vellum. So instead, I added a label sticker indicating the journaling was on the back side.

I used a pointy finger stamp. Remember when those were so popular? I had them in a few different stamp sets and think this was the first time I ever used one. Since this is also slipped into the pocket, I don't want someone looking at this later down the road, to not notice the journaling on the back.
Here's where I incorporate the latest Hello Story prompt which is also about opposities. How my Mama & I are very different, but a little the same.
This last tiny journaling card is just a guide to the photos I used on the page. It was a mix of photos from a few different places and occasions. I also included the dates. I think it makes it look a little like a library card & I absolutely love that! Especially since one of the things Mama and I have in common is that we love to read.
Oh and about the background paper. That's also part of Ali's prompt, which was also about contrast. I repeated "for the love of fall...for the love of pumpkins...for the love of orange...for the love of skeletons and crossbones" over and over again using the best white gel pen in the world!!! It is a lift of a background paper she made and used on one of her page prompts.  I obviously loved it so much I wanted to lift it. But I love how my page is different enough from hers and that it also feels very me. 

I love love love the colors in this! Probably because I love fall. I love the gray mixed with the orange and the green and the warmer tones in the photo.
And that title, it definitely came last. I think I had originally wanted to title this page "For the love of Fall..." to talk about how much Mama and I enjoy this time of year. But after writing the journaling, I thought peas & carrots would make a better one. And, I couldn't help but get excited that the colors so perfectly matched my page!

Me and Mama, we're a lot different. But a little the same.

I'm loving taking classes lately, in case you can't tell. I'm learning so much and totally enjoy being a student. What about you? Have you taken any classes lately, that you love? Share in the comments!

cheers & besos,

NSD: Scraplift Yourself

Saturday, May 11, 2013

....and I'm back! Apologies, apologies, that wee hiatus ended up last so much longer than expected! But I'm game to share some pages if you're game to keep coming back =)

I finally got to jump in on a few NSD challenges! It bums me out to no end that I miss this fab "holiday" every year. But I'm happy I broke my scrappy rut and got to create some pages.


This is for a whole slue of NSD Challenges: Shimelle's 4x6 photo, 2Peas Scraplift yourself, Shimelle's Scraplift yourself, Shimelle's Fabric, Studio Calico's 5 Different patterns, Studio Calico's Button.

I scraplifted myself on this page, taking inspiration from my Hello Berlin page. I loved that Heidi Swapp (background) paper. It was just decorative enough to add interest to the bits of the background that could actually be seen!


I mixed so many lines & collections on this page. Heidi Swapp for the background (obvs), Amy Tangerine vellum stickers...


...Whisper Graphics bags, a Studio Calico tag, tape & patterned paper...


....Basic Grey banner/flags, Fancy Pants buttons & paper. And chevron tulle!

I don't care one bit that these two pages are in the same album. I love them both! And especially the color combo in this one.

cheers & besos,

The Good Life Review

Wednesday, November 9, 2011

Look at this sweet shirt I made! Using my newly discovered favorite technique, the reverse applique, as pioneered by Amy Tangerine.

Since I was sharing my new shirt today, I thought I'd take the chance to write a quick review of The Good Life class, where I learned how to make it.


What I learned/liked:
  • This awesome reverse applique technique
  • A new watercolor technique
  • The lovely Amy! She's a sweet lady, there's no denying that :)
What I did not like:
  • The price point $45!!
  • Aside from the 2 techniques listed above, I didn't get much out of it. The class was more idea driven and let me show you how I put this page together-esque. Which is great, but I can see all of that for free on Amy's blog
If this class comes around again, and you're considering it here's what I think in summation:

Before spending the $45, purchase Amy's Get those Creative Juices Flowing class from Big Picture Classes. It's the same kind of style/vibe. I felt like both classes didn't have a lot of meat (i.e. techniques) to them, so to speak. But have more "big picture" (no pun intended) type ideas and philosophies behind them.

I think what drews me in is Amy's amazingly graphic style. I love the look of her pages! But I don't want to pay to see how she makes them.

The format was also a bit disjointed. I wish that all of the Week 1, Week 2, etc. content was together in one place. Rather than all of the videos are on one tab, all of the handouts on another, the weekly message on yet another.

While I'm a superfan of all things Amy Tangerine, and absolutely adore her products, I most likely won't be taking another class.

E-mail me if you have any specific questions!

Oh, and if you're wondering what EC1V refers to, it's my old post code from when I lived in London =)

xxbesos

Halloween Tees

Saturday, October 22, 2011

I signed up for Amy Tan's The Good Life class as a birthday present to myself. I might do a review of the class later but by far, the best lesson was Week 1 when she taught her Reverse Applique technique. I've already made three shirts!

I decided to start small, literally and made this little skeleton tee for Urijah John.

This was the template I used. I figured I'd never get it even on both sides, so I just drew half of it folded it in half and cut it out.


And it made a perfectly even mini skeleton as a template!

I used some woodgrain fabric (a fab find from Ikea!) and orange DMC floss to outline.
And then I decided to make a matching one for Grandma!


When we were down at the beach house this past weekend, I managed to get a quick photo of the two of them. It's blurry because he can't sit still! He's a constant blur of motion, my favorite little 2 year old.

I made a third shirt for myself, with a different design. It's something I'll be sharing here in a few posts :) Be sure to check back and thanks for stopping by!

xxbesos