Showing posts with label Mister Huey. Show all posts

LBD: Pie Chart Cards

Monday, March 11, 2013

Well hey there! Thanks for stopping by! I'm still crafting away with my March 2013 Little Black Dress Kit and today I wanted to share a quick card making tutorial with yall, sound good? =)

I love making cards. I didn't use to for some reason. I think because I didn't think I was very good at it. But slowly & surely they have become one of my favorite type of craft projects.

Every time I get a kit, I imagine ways to use the supplies to make not just one but multiples of the same card design. Why not make a few if you're going through the trouble of making one, right?!

To do this, I tend to stay away from adding pre-made embellishments. And instead, try to find creative ways to make my own, typically by using patterned papers, mists, punches, die cuts. You know, things that will stretch just a teeny bit further.

Here's one of the cards I made: 
I managed to make 4 out of a block of 6x12 in cardstock!


Here are the supplies I used:

LBD Kit Materials:
Tulle
Patterned paper scraps leftover for my projects
"Hello" die cuts cut from vellum

Non-LBD Materials:
6x12in block of white cardstock
Silver mist
Mint mist

Silver Tape

Tools:
Tiny attacher
Corner rounder
Silhouette Cameo


Step 1: Cut a 12x6in sheet of white cardstock into 4-3x6in rectangles. Fold in half.


Step 2: Mist cards with mint colored mist, drop silver splatters.


Step 3: Cut tulle squares. Adhere to card base.


Step 4: Round opposing corners of card base.

Step 5: Cut 5-2 1/2in circles

Step 6: Create a template using one of the circles, cut out pieces. (I labeled and numbered mine so I would know which was which!)


Step 7: Trace pieces onto patterned paper. Cut out.


Step 8: Using your fingernail, rough up the edges of each piece and adhere to circle.


Step 9: Die cut sentiment from vellum. Staple to pie chart.


Step 10: Adhere pie chart to card base.


And there you go! 4 min cards. These are very cute and tiny and I'm loving the color scheme. I can't wait to stick them in envelopes and send them off to some friends =)

I'm hoping to keep this up with each month's kit, a blog series if you will. Who doesn't like those?! Check back in April for the next one =)

cheers & besos,

Baby Shower

Friday, January 4, 2013

More 34th Street funness to share today. This was surprisingly a quick page made easier with the help of my Silhouette machine.


I cut a bunch of ellipses, because I don't know how to do circles yet :P (I really need to read more about this thing!) And then I backed some of them with photos or paper and embellished just a few.


These photos are from Susie's baby shower. She had quite a few but I went to just the one. I loved this shot of Susie and Kim. They are truly BFFs. Their friendship is going on 20 years and it's still so strong!


And here's hulking me (seriously I need taller friends!) next to tiny Susie.


Thanks for dropping by! Be sure to check back tomorrow for a big announcement and a chance to win some goodies!

cheers & besos,

Hi/Bye 2012

Wednesday, January 2, 2013

Happy New Year everybody! 

I hope you all had fantastic nights. MT & I had a super quiet night in, as both of us weren't feeling great. I'm still in recovery mode, but hopefully back into the swing of things by tomorrow. And also slowly but surely, back into the swing of blogging as well!

This week on the blog I want to share:
the last few 2012 pages,
a RAK,
& my plans for 2013!

Today I'll start with sharing this wrap up page for 2012. I used my Studio Calico 34th Street kit (finally!). 


2012 was a fairly quiet year for me personally. I saw my friends hit a lot of big milestones but didn't have much going on myself. Which was absolutely okay with me. Had to love that the stamp in this month's kit echoed those sentiments =)


Journaling Reads:

2012 was a good normal: work, home, travel. I got to visit new places and see old friends. Mama & Papa celebrated their 30th wedding anniversary. Papa turned 50. Kim & Eric got engaged. Baby Lauren was born. Urijah turned 3 & Cadie joined the family. In December, Matt & I moved apartments  It was a big year for some of my favorite people but a quiet one for me. And that's absolutely okay. I'm happy to celebrate with my family & friends. 2013 will be a bigger year for me. I can feel it.


This entire page literally resulted from that "hi" binder clip. And then the fact that the photo was from January and I was scrapping it in December. That's how "hi" and "bye" 2012 came about.

As far as design, I ended up using a lot of arrows in this page. I love how they're all pointed one way, while the triangles in the background paper are pointing another. I feel like it emphasizes the "hi" and "bye".  Looking back, thinking forward. All that fun symbolism and stuff.


Also loved that one of the little brads says house & home. It's perfect since MT & I said bye to our old apartment and then hi to the new one!

Which btw, speaking of the apartment, I'm about 95% done setting up and organizing my new scrap area. I'll be sharing that with you all too!

So be sure to check back this week for more 34th Street pages, my scrappy plans for the year and of course, don't forget the RAK!

cheers & besos,

Queen Card

Friday, November 9, 2012

Happy Birthday Mrs. T! 

It's MT's mama's birthday today. So I made her a card for him to send. I used an old Simon Says Stamp card kit that I hadn't touched (I know!!) and made it a bit shabby chic. It's not my usual style, but I still liked how the card turned out.


I gravitated to the crown patterned paper and a gray/pink/white/cream color scheme. And just layered some elements on top of a doily, before paper clipping (and also adhering them) to the top of the card.


The dimension is what makes this card for me. I only glued the one corner together, the rest I left to hang loose a bit.


I printed the sentiment out on vellum, bordered punched the bottom and washi taped it to the card. And for some extra texture, I wrapped baker's twine around the card and finished it off with a bow.

cheers & besos,

Christmas with Urijah

Sunday, November 4, 2012

I scrapped! I just couldn't take not scrapping anymore. I started these pages last night at 10:00 pm. 

Last week, I pulled out my Christmas box. I went through it all, rediscovering some of the great products I had, getting ideas and inspiration for this year's Christmas card. But I ended up with a pile of patterned paper scraps and odds and ends on my desk. Which was really helpful with this week's Studio Calico challenge.

As soon as I saw that it was a puzzle challenge, I knew I wanted to make a star. I pieced this one together tucking one leg under the photo and one over a corner that didn't have much in it. I love how it's all tucked in there nicely, the way Urijah is tucked into my brother's lap. And I love that the stars point and frame the two of them.

This page ended up being super hodge podge, as I pulled a ton of different designers and lines together. I like scrapping like that. I'll have to start doing more non-kit scrapping!


This next page was almost entirely done using last year's Studio Calico/Ali Edwards December Daily kit. I still really love that kit. And yes, I'm even ashamed to admit that I haven't used as much of it as I would have liked. But I'm doing it now, right! That has to count for something?!

I also used last week's Studio Calico Sunday Sketch for this photo of Urijah opening up his presents. I changed it up a lot, to make it work with my photo, but the basics are all still there.


Can I just say, I love a red and green color combo. Most of the time I'm trying to not let this combo look to Christmasy. But now, as I'm making these pages, I get to go all out!

I also love how they look in my book side by side. It just makes me happy =)


Oh, and in case you're wondering. I did not use last year's kit as a December Daily album. It's my Christmas album that I plan to keep adding to over the years.

What about you? Did you buy any December Daily or Christmas kits? Do you plan to DD or just use the stuff? I'd love to hear!

I pre-ordered both (yes I know I'm obsessed!) the Studio Calico and Kelly Purkey kits. I cannot wait for  them to get here. I already have plans for my KP kit. Still working on what I'm doing with SC's. Stay tuned, we'll find out together!

cheers & besos,

3x5x30

Saturday, October 13, 2012

Sharing 3 cards made in 5 minutes and blogged within 30 minutes. This is live people! =)

I'm short for time these days. Between work travel, work, the new mentoring program I'm starting at work, being sick and now studying for my PMP exam, the days...well they aren't getting any longer.

Yet, somehow I still have time to kill hours on the internet :P Which is how I came across Ellie's 5 Minute Card Challenge.

Knowing I needed to make something, I've been itching to do it! And knowing I needed to update the good old blog. I figured I could squeeze in a 30 min activity. 


I grabbed 3 card blanks and my Roller Rink Card Kit. I quickly gravitated to the printed vellum speech bubbles. I paired them all up and went through the paper pad to find coordinating colors.


Loved the green, red and gray together! So I tore 'em out and ran them through my Big Shot using the Papertrey Ink banner builder dies.

For dimension, I added either a Amy Tan sticker or an MME enamel dot. Then, I snipped a piece of twine (not included in the kit) for each card and tied knots on both ends. Glued them to the top of the banner and finished with a sprinkling of Mister Huey in Clay.


I wanted to play with both rounded and straight edges, since the speech bubbles reflect both those designs so well. Corner rounding the one edge was the last step.

And done!! 3 cards, made in 5 minutes (or thereabouts) and blogged within 30.

Deep breaths....and now I head off to study. Happy Saturday!

cheers & besos,

Mini Pages

Monday, August 27, 2012

"Soo meaty..." is all I keep thinking whenever I look at this page! (The Soup on E! reference) But I digress....

I like to mix it up in my scrapbooks. I have pages of all shapes and sizes for the most part: 12x12, 8 1/2x11 and now 6x9! I bought an extra pack of 25 page protectors, last year when Studio Calico released their December Daily mini album. I have to say I love the size! 

I usually have to punch an extra hole in the page protector, since the rings don't match up, but other than that it's no trouble to include these mini beauts in my 12x12 albums.

Summer of 69 was the basis for these pages. Boy, was that orange dot paper really throwing me off! I couldn't figure out what to do with it! Even now, it's only just barely referenced in this page, but I'm so happy I figured out some way to use it!!


This gray patterned paper with white designs was just screaming to be colored in. I used Maya Mist to add the color. First I decided to paint the circles with a brush and just a drip of water. But they  didn't look right. So I sprayed a bit over top. I love that doing that gave me 2 different shades of yellow (my fave color btw).

I did use one none kit item on this page, that great Hello tape. But I had to use it on this page about my first day back with my old roomie. We hadn't seen each other in 3 1/2 years!!


This next page was about my navigating the Japanese metro by myself that first day. I had good directions and all. But after 18 hours of traveling, I really wasn't in the best frame of mind to deal with foreign languages. I still made it! And figured out that I didn't have to change trains after all. Chalking up another point for the wandering wonder =)

cheers & besos,

Buddha

Wednesday, August 22, 2012


We went to visit Kamakura's Big Buddha, us and a whole lot of school children. There's not much to say other than that he's there and he's big. You can walk into him but we opted to not spend the 30 cents to stand in a crowded dark room with the aforementioned children.

But I got to see how verdant and lush is the foliage in Japan. It was lovely to just walk around outside, albeit hot and mega humid. It explains all of the green!!

This page, about our token visit to Buddha (peace signs thrown and all) was fairly simple to make. I used a Prima feltie as a mask and sprayed Dark Calico Mister Huey. Then it was just a matter of layering papers and stickers in a pleasing askance way.

I went. I saw. I recorded.

cheers & besos,

Summer of 69

Sunday, August 12, 2012

My new Studio Calcio kit + add-on arrived this week! Just had to sit & snip with all of the lovely products. I was excited that it featured so much color.

Working my way through my Japan photos now, and I even managed a two pager!


Kamakura is a local tourist spot, only a few stops from Zushi where Sarah lives. It was the first place we visited and I took a lot of photos. I almost exclusively used my iPhone on this trip, instagramming every night once we got back home. Thanks to those of you who follow me there (jamieleija) and endured the heaps of photos I was throwing your way!


I took a lot of photos and saw a lot of things while visiting Japan, but hands down my favorite memory of the trip was Sarah. It was unbelievably awesome to spend time with my old roomie, face to face.


cheers & besos,

Amy Tangerine Cards

Tuesday, June 19, 2012

So I've had the gorgeous Sketchbook line from Amy Tangerine since it came out. But it's just been sitting there unused! It's fun, it's bright, it's happy. But I can't figure out which photos would work with it. For the time being, I decided to make some cards.

For this one, I used one of the newer Jenni Bowlin punches and went to town on some scraps.

I even decorated the inside!

The green in this collection is gorgeous, deep and grassy. And I like the solids aren't flat, there's a lot of dimension in them as well.
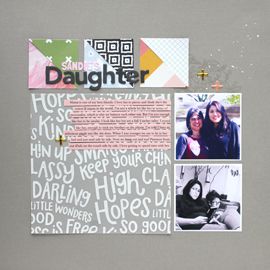
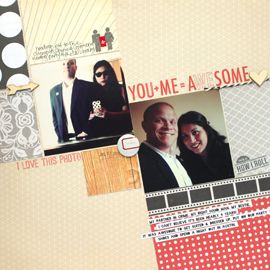
Plus, I love all of the little details and these fun canvas flags.

This collection made throwing these cards together in a snap! Love it's bright happy vibe =)

cheers & besos,