Showing posts with label Eric. Show all posts

Awesome Nerds

Wednesday, June 17, 2015

It's raining here in Houston. But not half as bad as they predicted it would rain…and flood! Schools and businesses were closed yesterday and it barely sprinkled. I think everyone was in a panic after the flooding we had a few weeks ago. I suppose it's better to be safe and over cautious than sorry after the fact.

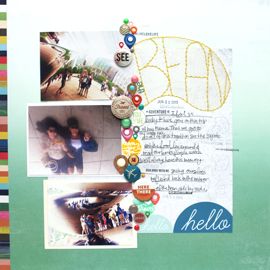
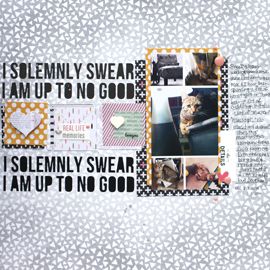
But because I worked from yesterday, and therefore didn't have to commute, I had a free hour to scrapbook on a weekday. That's really unusual for me. I come home so tired and drained. The last thing I want to do is sit at my desk. But yesterday I got to do that and here's what I made.
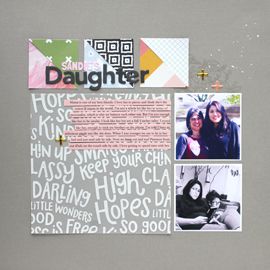
It's a totally just for fun page without any journaling. The photos are from Kim & Eric's 30th birthday party last Saturday. I might add just that somewhere but for now I'm happy with it like it is.

I used my Have a Little Fun Today Scrapbook Circle kit. The title is from The Cut Shoppe.
The wacky color combo just might be my favorite part! I thought the paper went so perfectly with Kim's green dress. But the pattern was so busy I only wanted to use a wee bit.

And since there were pops of red in the photos (Eric's shirt and the red lips prop) I pulled out the few red embellishments that were in the kit: the red acetate star and red flair badge. I wanted red in three different places so I outlined the heart in the title with red stitching.

I also wanted the title to be more pronounced, since the patterned paper by itself didn't have enough of a pronounced edge. So I messily (a word?) outlined the letters in pencil. I didn't use black on the layout and since the patterned paper had a really great gray in it already, I thought the pencil would be the better option over a black pen.

There were yellow banners hanging behind us in the photos, and they very nearly matched the yellow in the tag included in the kit. So I had to incorporate it onto the page and in the crook of that "e" seemed the best place. It filled in the negative space really well in the end.

Like I said early, there's such an odd concoction of color on this page, but I think it's why I like it!
The rest of my embellishing is fairly minimal. A few enamel dots and then this quote.

The quote was actually on the branding strip for the triangle patterned paper. I cut it off and was about to throw it away when I noticed the little hand with the feather pen. It was such a perfect sentiment for this page.
This was an awesome little deviation from my regular work week. I liked getting an extra just for fun page in and am going to figure out how I can keep it up!

It's helped that I'm logging my time this week, to get a better understanding of what I'm doing. The goal is to be able to really focus on doing what I love to do.

Anandi shared this book ("I Know How She Does It: How Successful Women Make the Most of their Time" by Laura Vanderkam) in the Paperclipping Forums. I purchased a copy and started reading it. I'm having a bit of trouble making my way through it, but I think the underlying messages are good. I checked out Laura's website and become more interested in her 168 Hours book and the free content she had available.

I'm thinking I'll do a separate blog post about this since I clearly have some stuff to say! I'll leave it at this for now. Here's me wishing you a lovely (and non-flooded) day!

cheers & besos,

Hello Today

Monday, June 17, 2013

Morning yall! Wow, I never expected this much of response for the giveaway! Thank you all for commenting. It's going on until Sunday, so if you haven't already comment while you have the chance.

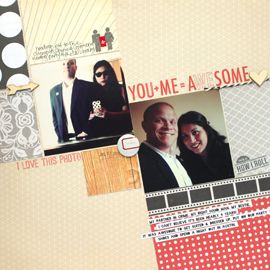
This morning, I just wanted to do a quick share of a fun page I made over the weekend. It's not for any challenges, I didn't use any kits, I just grabbed some stuff from my "new goodies" drawer and played.

I'm loving the look of stacked photos these days. And thankfully, these photos had enough "dead" spaces for me to layer them on top of each other. And I got to cover up our messy brunch table.
I used more goodies from The Pier collection by Crate Paper. I love it so much!!
I loved how the photos looked on this neutral background color. It made them pop AND meant I could add color with my embellishments. I had fun clustering these around the page.
Just a sprinkling of gold Color Shine and I was done with my page.

Thanks for stopping by! Happy Monday everyone =)

cheers & besos,

Travel Birthday Cards

Thursday, June 6, 2013

It's class time!!! I'm so excited about Camp Scrap guys. This morning I woke up and read all the handouts. And today, because I got out of work a bit early, I came home and watched the videos. 

Day one and I'm having fun! So much fun I made a few cards. They weren't really inspired by the class or the videos. I really just wanted to make something after seeing May craft a few of her projects. She was just so excited, I couldn't help myself. Infectious (in a good way) would be the best way to describe May =)

So here we go!

Kim & Eric (the ones that just got married) are off for their honeymoon on Monday. It was a bit delayed, mainly because they're teachers and wanted to wait for summer. But coincidentally (or perhaps not) it's also their birthdays next week. (Seriously, could they not be the cutest couple?!) I made them a few travel themed birthday cards to celebrate!

Kim's card is airmail themed. I just wanted to use that tape really! I pulled some stickers and chipboard and then grabbed a London themed post it tab to stamp her birthdate on. I like including people's birthdays on their cards or on the envelopes. It adds a ton of personalization with literally no effort.


And since Eric is Mr. Outdoors, I so wanted his to be boy-ish and rugged. I knew I had to use that compass. It just screams ERIC to me. I also got inky and used my stamps and mists to jazz up the card base.


I love how these look together. I had so much fun making them. And I've discovered that I like making cards with people in mind rather than just random creations. I think they come out so much better!

And I so love these two people. They are the cutest and the most fun. I hope they have a blast on their honeymoon. They deserve it!

That's all for today folks. But I'l be back soon with Little Black Dress kit pages and a few videos, I started one of my summer projects and I'll be talking about what I'm planning and how I'm working through this class. See guys, a totally great summer!

cheers & besos,

K&E Card

Sunday, May 26, 2013

I can't believe I'm only just now getting around to sharing this. It's only been, what 3 months!!!

Here's the wedding card I made for Kim & Eric. It came a few days after the wedding, but I think it's all the better since I got to use a photo from the big day.


I created an "E" card (ha, pun!) in Silhouette and die cut it from Kraft cardstock. Then I printed a photo onto vellum and glued it to the backside of the "E". I made sure to choose an "E" that was thin so that you could still see the photo well enough.


The insides of the cards are always the hardest part for me! But I think I managed this one. Love that when the card is closed you can see the words peeking through the vellum.


And then I slipped it into a purple envelope (one of her bridal colors). They loved it! Eric thought I had made it for me. Kim explained, "No amor, it's for Espinoza..."

It may be 3 months later, but I'm still so happy for my friends. Congrats again you guys!

cheers & besos,

First Video

Sunday, May 12, 2013


My first video! I did it! And it was fun =) Not easy but still fun. Bear with me guys, this was my first ever video. I was having to learn iMovie this morning as I went along. But luckily it's pretty straight forward. And as I say in the video, apologies for the shaky cam! I'll work on it for next time.


Here's the Shimelle sketch I based my page off of:


...and some close-ups of the finished layout! 


Let me know what you think!

cheers & besos,

LBD March Layouts

Thursday, March 7, 2013

Hey there! I'm so excited to share my first pages for the Little Black Dress Kit club, using the A Chance for Luck kit. I've just shared all the bits and pieces you get from this kit and now I want to show you my layouts!

I loved the monochromatic look of the papers so I used a bunch on this page about me. I shared 5 things about life right now in March 2013.
  1. I am a new member to the Little Black Dress Kit club! (I should probably have added design team member in there. But as I was doing this at 1am I wasn't actually thinking straight!)
  2. Wishing I could sleep more. This year has already been a whirlwind. Off to San Antonio for work this week. (Ha! See item one)
  3. So loving anything metallic right now & am wearing my latest favorite dress in this pic.
  4. Losing weight! Down 10 lbs since the new year & hoping to lose much more.
  5. Planning my holidays for the year. I want to make it to Australia but will definitely by visiting the Pacific Northwest with MT this summer.


I used my Silhouette to cut out these tear drop shapes. They're fairly similar to the silver pattern on my dress. But these I backed with all the great grays & neutrals. I dappled some gold Heidi Swapp Color Shine (which btw I absolutely adore. I bought all the colors!!) And added title on top of a piece of wood veneer.

This is for my monthly black cardstock challenge. I don't use this rich hue enough in my scrapbooking. So I'm hoping to share a monthly page using this overlooked neutral.


The next page features one of my favorite families. My friends Susie & Gus welcomed baby Lauren last August and they are the absolute cutest. I love this photo of the three of them. I snapped it at Kim & Eric's wedding last month.

I had fun with the background paper and did some painting with pink mist. Then I outlined the hearts and added in a few of my own. There's so much love in this little family love had to be the theme.

I used that kraft butterfly I was talking about, instead of hoarding it like I wanted to. And I used some wood veneer, a Silhouette cut and a little kraft envelope to anchor the photo and create a title.


This last page is just fun. I loved the Studio Calico patterned paper, with it's neutral gray color and its diagonal stripes. They were just begging to be filled in with pops of color and a bit of texture.

I used some patterned paper strips and a few of the great trims. I like all the color on here since we're all wearing different colored clothes in the photos. I added just a bit more dimension with the gorgeous gold buttons and the red brads that came in the kit.

Next, I'm sharing the two cards I made. Check back in just a few for them =)

cheers & besos,

Forever & Ever

Sunday, February 24, 2013

They did it! Kim and Eric got married last week =) I'm so so happy for both of my friends. 

The lovely couple met in high school but were only friends then. They stayed friends through and after college. And nearly as long as I've known Kim, I've also known Eric. He's such a great guy. I love how much history they have together. And also too, how much history my circle of friends has with him. Eric may have been Kim's friend first, but it didn't take very long for him to just be another of the group.

I'm not gonna lie it was a bit scary when they first started dating. I loved them both so much as individuals and didn't want either to get hurt. Thankfully, all my worries were unfounded. Because here they are today, married!


I made this fairly simple page with the help of a Bright Ideas prompt. The prompt was to go big, with either your title or your photo. I opted to do both!

This is the first time I've ever edited a photo like this. But boy, was it so easy to do thanks to the help of this quick video.

I die cut the title using my Silhouette and backed it with some watercolored cardstock. It was so quick and simple, but completely high impact.

And after all of the months of planning, the wedding has come and gone.

To Kim & Eric! May they have a lifetime of happiness together.

cheers & besos,
Enlarged Prints

Sunday, June 17, 2012

Every once in awhile I place a Persnickety Prints order. Mainly, I have them print odd and enlarged sizes because most everything else can be done here at home with my handy little PictureMate.

This month, I printed an instagram shot at 8x8 and a few of my Italy shots at 5x10. And I just wanted to quickly share two pages I made using these lovely enlarged prints.

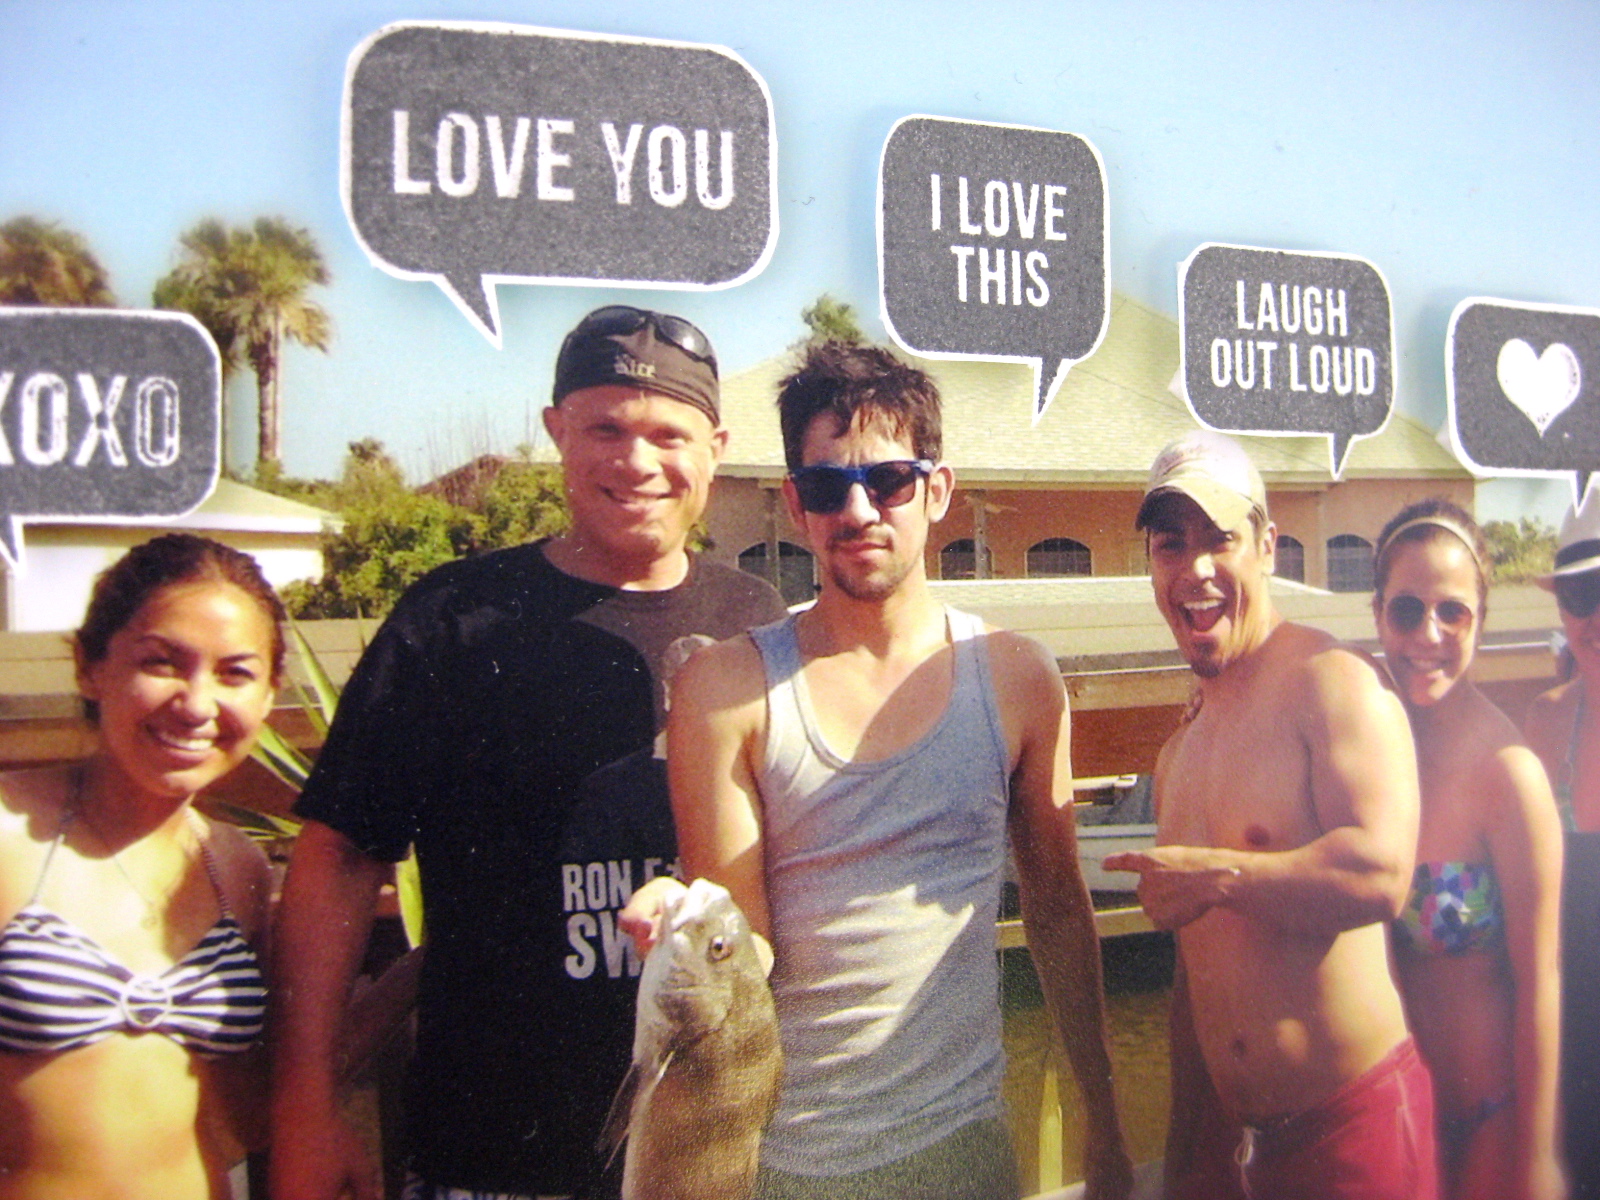
For Memorial Day this year, me and a group of friends headed down to the beach house for a weekend of relaxation and togetherness. I made sure to get a group shot of all their lovely faces (and of course Joey being silly) and was pleasantly surprised at the quality of the instagram shot. Good to know that these can be blown up!!


I used the So Cal kit + Newport & Venice Beach add-ons and die cut some of my patterned paper scraps into those cute little tags (Papertrey Ink die cut).


Then, I added tape around the edges and letter stickers for the title & subtitle.


And finished it off with those awesome speech bubble stamps from the Venice Beach add on. Love that I got to highlight the majority of them. Having all these people in the photo helped with that!

Here's another layout I did with one of the 5x10 prints. It's a scraplift of this fabulous layout by naomiatkins, that I unearthed from the Studio Calico gallery.


Like Naomi, I played with sunbursts and doilies. But I also added some buttons & butterflies and that cute little pennant flag.


There was a bright patch of blue sky in the upper left hand corner that I covered up with a die cut tag and some letter stickers. The brilliant blue was clashing with the soft colors of the layout!


I even scraplifted Naomi's lovely title. So simple and sweet.

It's always fun working with enlarged prints. But the photo has to be really special for me to want to focus an entire page on just the one. Both of these qualify, the first because it showcases everyone who came out on Memorial Day. The second, because it's a great proof of visit shot with lost of context. Plus I look kind of cute :)

Do you scraplift enlarged photos? Would love to have you share in the comments, a favorite page if you do!

cheers & besos,

E&K Engaged

Sunday, June 3, 2012

And another two bite the dust! :) Lookie who got engaged, sweet Eric and lovely Kim. 


After a very romantic moonlight horse drawn carriage ride in Brackenridge, CO Eric proposed to Kim. She said yes and they sent us all this photo to share their exciting news. It was 1030 at night (so Kim)!!

I saved the photo and ran it through Instagram with a few different filters & printed it both 4x4 and 3x3.

While I was at Susie's this weekend. I put this together while she worked on one for baby Lauren's room. I played with shipping tags, envelopes, labels, fun mini bags & clothespins and of course some embellishments. It's something for their brand new to them home. 


I wish them both every happiness! Love you two :)

cheers & besos,

Thodes

Monday, April 23, 2012

Right now, under the title of this post, there is a squiggly red line under the word Thodes. Aptly so, because it isn't a word!

Hey dearies! I was posting fast and furious there for awhile. Now work has descended on me and so I'm stepping back for the next few weeks.

But I wanted to share this fun page I made using only stamps and sequins, my new favorite thing!
Have you ever played bananagrams? It's like scrabble but more cut throat? ;) Kim tried to play Thodes as a word. Yeah, it didn't work out for her. But the word just makes me smile :)

This layout is so so simple. Instagrams + Project Life stamps + Charcoal chalk ink + smattering of sequins! I love that it's simple. I'm so not even bothered by how the stamps didn't stamp perfectly on the textured cardstock.

Did you know my favorite color is yellow? I'd think you might after reading this blog for a bit. Love the pops of my fave color on this page!

Thanks yall for your patience with me and this blog. I will be posting again soon!

cheers & besos,