Showing posts with label Susie. Show all posts

Awesome Nerds

Wednesday, June 17, 2015

It's raining here in Houston. But not half as bad as they predicted it would rain…and flood! Schools and businesses were closed yesterday and it barely sprinkled. I think everyone was in a panic after the flooding we had a few weeks ago. I suppose it's better to be safe and over cautious than sorry after the fact.

But because I worked from yesterday, and therefore didn't have to commute, I had a free hour to scrapbook on a weekday. That's really unusual for me. I come home so tired and drained. The last thing I want to do is sit at my desk. But yesterday I got to do that and here's what I made.
It's a totally just for fun page without any journaling. The photos are from Kim & Eric's 30th birthday party last Saturday. I might add just that somewhere but for now I'm happy with it like it is.

I used my Have a Little Fun Today Scrapbook Circle kit. The title is from The Cut Shoppe.
The wacky color combo just might be my favorite part! I thought the paper went so perfectly with Kim's green dress. But the pattern was so busy I only wanted to use a wee bit.

And since there were pops of red in the photos (Eric's shirt and the red lips prop) I pulled out the few red embellishments that were in the kit: the red acetate star and red flair badge. I wanted red in three different places so I outlined the heart in the title with red stitching.

I also wanted the title to be more pronounced, since the patterned paper by itself didn't have enough of a pronounced edge. So I messily (a word?) outlined the letters in pencil. I didn't use black on the layout and since the patterned paper had a really great gray in it already, I thought the pencil would be the better option over a black pen.

There were yellow banners hanging behind us in the photos, and they very nearly matched the yellow in the tag included in the kit. So I had to incorporate it onto the page and in the crook of that "e" seemed the best place. It filled in the negative space really well in the end.

Like I said early, there's such an odd concoction of color on this page, but I think it's why I like it!
The rest of my embellishing is fairly minimal. A few enamel dots and then this quote.

The quote was actually on the branding strip for the triangle patterned paper. I cut it off and was about to throw it away when I noticed the little hand with the feather pen. It was such a perfect sentiment for this page.
This was an awesome little deviation from my regular work week. I liked getting an extra just for fun page in and am going to figure out how I can keep it up!

It's helped that I'm logging my time this week, to get a better understanding of what I'm doing. The goal is to be able to really focus on doing what I love to do.

Anandi shared this book ("I Know How She Does It: How Successful Women Make the Most of their Time" by Laura Vanderkam) in the Paperclipping Forums. I purchased a copy and started reading it. I'm having a bit of trouble making my way through it, but I think the underlying messages are good. I checked out Laura's website and become more interested in her 168 Hours book and the free content she had available.

I'm thinking I'll do a separate blog post about this since I clearly have some stuff to say! I'll leave it at this for now. Here's me wishing you a lovely (and non-flooded) day!

cheers & besos,

Family Everyday

Tuesday, October 7, 2014

I made this page back in August, but am only just now getting around to sharing it with you!! It was one of the 5 pages I did in the morning before Lauren's birthday party (see the rest of them here).
We did a potluck for friend's Christmas last year and I got to snap photos of everyone. These were absolutely some of my favorites. The lighting was perfect, the subjects were cute, their clothes were fun colors. Sigh…yes everything just jelled. To highlight the series, I made a quick photo collage in PSE.
The embellishing ended up being super simple. Just a banner across, cut with my Papertrey Ink banner builder dies, some twine, a die cut and some Thickers. Viola!

cheers & besos,

Simple Scrapper Sketches

Friday, September 12, 2014

Every year for Lauren's birthday, I give her scrapbook pages for her album. This year I didn't have much time to put them together, only the morning before the party! So I pulled some photos, grabbed my Simple Scrapper Spark Mag and its sketches and went to work.
If this first page looks familiar, it's because Jennifer used one of my pages as the basis for the sketch! I used a lot of Crate Paper's Open Road for this one.
I had fun manipulating this photo in Photoshop Elements. I converted it to black and white and colored the family back in. I like doing this for photos with busy backgrounds. It's so easy too! This is my go to tutorial, because I forget all of the steps every time!

I used odds and ends from the Scrapbook Circle August kit for this. Including the printables!
And this was my big hand cutting title page that I shared a few weeks back. The Simple Scrapper sketch called for a big title. Well I made one!

In one morning and part of an afternoon I was able to crank out 4 pages (+1 other) using Simple Scrapper sketches. It's what I love so much about being a member. I don't have to run around finding inspiration. It's just there for me in one neat little monthly package. The perfect starting point for many a project :)

cheers & besos,

Birthday Brunch

Saturday, March 1, 2014

I made layouts! Oh man have I missed making layouts! Like I mentioned before, the whole Project Life thing has been taking up a lot of my creative time. So last weekend I was determined to make some good old fashioned layouts. 

Since it had been awhile, I was a bit stuck, creatively that is. So I turned to my Simple Scrappers monthly mag and just started playing around with the sketches.
I was really influenced by Jennifer's take on the sketch. I added in a doily and that vellum die cut because of her :)
I took my color inspiration from our clothes, choosing papers that coordinated with each of our outfits. It made for a wacky color combo. Both those always end up being my favorites!
I also got to use some of my new Studio Calico goodies. I NEED more of these oh so fabulous gold letter stickers.

The finishing on this was so simple. A few enamel dots, date stamp and just a tiny smattering of gold mist.

It's such a clean page and because of that, the photo really stands out. Love that!

cheers & besos,

Monochromatic Birthday

Saturday, October 5, 2013

My birthday was last Friday! Oh my birthday...that whole day went by in a blur. I planned a fun party for my friends and asked if everyone could wear wigs! I thought it'd be fun to celebrate the last birthday of my 20's with something fun and crazy.

We took some great group photos of us in our crazy fun colored wigs. Obviously, I really wanted them to stand out. So I took on Jennifer's left-brained Color Challenge from Art + Science and only worked with neutrals. 
It was soooo hard! All I wanted to do was add in neon pink! But I refrained. And I think, the page came out the better for it. Instead, I used a lot of black and white elements plus gold and a touch of gray.

Us in those wigs definitely became the focal point!
Lately, I'm absolutely loving digital elements. And Two Peas is giving us some completely fabulous options! And of course, since black and white has become such a big part of my scrapbooking, I'm loving all of the October releases!

For this page, I incorporated some fabi printables and a freebie die cut from a few months back. (Snag it now!! They're available again for just a short while)
My Cameo cut the freebie die cut perfectly and I used it as a mask with some Heidi Swapp Gold Lame Color Shine (my favorite!). It didn't mask very well in certain parts, so I drew around the shapes using my black pen--on the white parts--and my white pen for the darker parts at the bottom.

I also finally got to use my new Pebbles Alphabet Stamp.
Oh, and about the background paper, I created this background of black and white photo strips in PSE and printed it out on white orange peel cardstock. All the photos were edited using Rad Lab. Heck all of my photos are edited using Rad Lab!

I had fun making this page. I had fun this night! Be prepared to see this photo and others like it over and over again. It was just so fun =)

cheers & besos,

Handstitched Cards

Sunday, August 25, 2013

What's with all of my married friends being born in pairs?! Kim and Eric are born in June. Susie and Gus (and now Lauren) have August birthdays. So it's more coordinating cards from me! (See K&E's travel birthday cards here)

Lately, I'm loving a neutral background with pops of color, mixed alongside a bold graphic design. So I custom made a boy and a girl version using paint, mist, black and white washi and stamps.

For Susie's card, I was inspired by the Mama Elephant Photo Challenge again. I love the white with the pops of pink and black. And instead of the yellow as in the inspiration photo, I used gold.
Tim Holtz Distress Paint is pretty awesome. The dauber makes it so easy to smear across a stencil. This pink is Picked Raspberry. It's so vibrant IRL (and in this photo thanks to RadLab). 

To back the sentiment, I used a few date stamps and gold brilliance ink to create a text block. I wrote the word "happy" on a scratch piece of vellum and poked holes where I wanted them over the text. Then I stitched through with black thread.
For Gus' card, I knew immediately that I wanted to create an argyle pattern. He's a sock guy and so that pattern just seems him to me. I used my Silhouette to cut a diamond out of scratch paper and then used it as a mask for the blue blocks (that's Distress Paint in Salty Ocean).
I traced more diamonds with a pencil and poked another round of holes. This time I stitched them in teal and finished the card off with tape and a die cut that was misted with Heidi Swapp Color Shine in Bronzer.
The "Happy Birthday" stamp is by Papertrey Ink, a set I had totally forgotten about but still completely love! Might need to place another order with them sometime soon, they have the best stamps!

Happy belated birthday Gus! And happy early birthday Susie! The month of the Cruz celebrations is almost complete =)

cheers & besos,

Lauren's Pages

Wednesday, August 14, 2013

A special little lady turned one last week. For her birthday, I contributed a few pages to her scrapbook. I spent a happy Saturday making these for her. It was fun to just play with my stash, no rhyme or reason, no challenges or assignments.


Find more Lauren pages here =)

cheers & besos,

Hello Today

Monday, June 17, 2013

Morning yall! Wow, I never expected this much of response for the giveaway! Thank you all for commenting. It's going on until Sunday, so if you haven't already comment while you have the chance.

This morning, I just wanted to do a quick share of a fun page I made over the weekend. It's not for any challenges, I didn't use any kits, I just grabbed some stuff from my "new goodies" drawer and played.

I'm loving the look of stacked photos these days. And thankfully, these photos had enough "dead" spaces for me to layer them on top of each other. And I got to cover up our messy brunch table.
I used more goodies from The Pier collection by Crate Paper. I love it so much!!
I loved how the photos looked on this neutral background color. It made them pop AND meant I could add color with my embellishments. I had fun clustering these around the page.
Just a sprinkling of gold Color Shine and I was done with my page.

Thanks for stopping by! Happy Monday everyone =)

cheers & besos,

LBD: 8 1/2 x 11 Layouts

Thursday, May 23, 2013

More Little Black Dress kit pages, for your viewing pleasure today. Here are two 8 1/2 x 11 pages I put together. Don't adjust your screens, that second page is meant to be tilted. Loved getting to work with the bright fun colors in the Miss Maggie kit.


cheers & besos,

LBD March Layouts

Thursday, March 7, 2013

Hey there! I'm so excited to share my first pages for the Little Black Dress Kit club, using the A Chance for Luck kit. I've just shared all the bits and pieces you get from this kit and now I want to show you my layouts!

I loved the monochromatic look of the papers so I used a bunch on this page about me. I shared 5 things about life right now in March 2013.
  1. I am a new member to the Little Black Dress Kit club! (I should probably have added design team member in there. But as I was doing this at 1am I wasn't actually thinking straight!)
  2. Wishing I could sleep more. This year has already been a whirlwind. Off to San Antonio for work this week. (Ha! See item one)
  3. So loving anything metallic right now & am wearing my latest favorite dress in this pic.
  4. Losing weight! Down 10 lbs since the new year & hoping to lose much more.
  5. Planning my holidays for the year. I want to make it to Australia but will definitely by visiting the Pacific Northwest with MT this summer.


I used my Silhouette to cut out these tear drop shapes. They're fairly similar to the silver pattern on my dress. But these I backed with all the great grays & neutrals. I dappled some gold Heidi Swapp Color Shine (which btw I absolutely adore. I bought all the colors!!) And added title on top of a piece of wood veneer.

This is for my monthly black cardstock challenge. I don't use this rich hue enough in my scrapbooking. So I'm hoping to share a monthly page using this overlooked neutral.


The next page features one of my favorite families. My friends Susie & Gus welcomed baby Lauren last August and they are the absolute cutest. I love this photo of the three of them. I snapped it at Kim & Eric's wedding last month.

I had fun with the background paper and did some painting with pink mist. Then I outlined the hearts and added in a few of my own. There's so much love in this little family love had to be the theme.

I used that kraft butterfly I was talking about, instead of hoarding it like I wanted to. And I used some wood veneer, a Silhouette cut and a little kraft envelope to anchor the photo and create a title.


This last page is just fun. I loved the Studio Calico patterned paper, with it's neutral gray color and its diagonal stripes. They were just begging to be filled in with pops of color and a bit of texture.

I used some patterned paper strips and a few of the great trims. I like all the color on here since we're all wearing different colored clothes in the photos. I added just a bit more dimension with the gorgeous gold buttons and the red brads that came in the kit.

Next, I'm sharing the two cards I made. Check back in just a few for them =)

cheers & besos,

Farmhouse Fun

Tuesday, January 15, 2013

Ick Winter! Ours here in Houston are rainy and right now, very cold. I wish I could stay bundled up and warm here at home, but alas to work I must go.

Before I do that, I wanted to share another Block Party/2Ps CHA Challenge/Studio Calico CHA Challenge page. And also point out how crazy busy my Fall was. From a weekend in NYC to a weekend in the Hill Country, I was all over the place. Here's a separate page of our bachelorette weekend of fun.

We stayed at the cutest little farmhouse in Johnson City. (Seriously, if anyone needs a recommendation on a place to stay in the Hill Country, I would totally recommend this place.)

It was cute.
It was quaint.
It was red & turquoise!

And the Block Party kit had the best red & turquoise in it. I loved this patterned background paper and thought it went really well with a farmhouse theme. And of course that pocket was another perfect red & turquoise accent. 


I played around with F's for my 4 word title. It's not really a coherent string but still descriptive =)


There's not any journaling on the page, because honestly I didn't know where to put it. But I'm confident I'll make a coordinating 2nd page to talk about our weekend and all of the craziness and fun we had in this sweet little house.

Until later, I hope you're staying warm & dry!

cheers & besos

Bachelorette Mini

Sunday, January 13, 2013

Morning! I'm up bright & early today because someone's phone kept buzzing for unknown reasons. It's somewhat close to the time I usually wake up so here I am, up and blogging at 6am on a Sunday =)

I have the winner of last week's RAK for you all, but first I wanted to share this mini book I put together for Kimberly. 

Did I tell yall I'm going to be a bridesmaid? First time in life! I'm excited but curious to see what this whole experience is going to be like. 

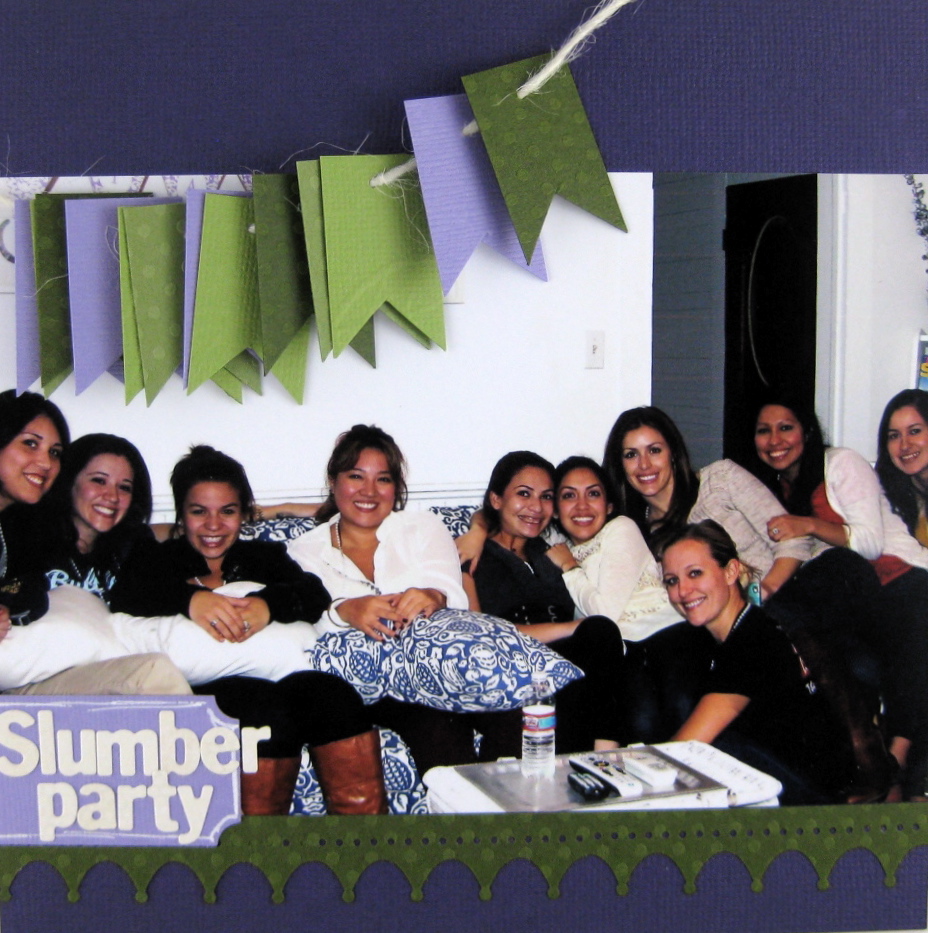
Well, now that I think about it, it's already started. Tara, Susie & I threw Kim a weekend long party in the Hill Country for her bachelorette. Ten girls spending the night in an adorable farmhouse, literally in the middle of nowhere. It was a blast! 

We also did a bit of wine touring in the local area. But for me, the silliness that went down in the evenings, the talking, the laughing, the relaxing and watching movies. That for me was the best part.

I put together this 6x6 mini book with just a few supplies: green and purple cardstocks (Kim's colors are green and purple, and handily fit with the wine tour theme), a package of purple flowers, pearl trim, purple lace trim, washi tapes in purple & green, and a package of Jolee's with a wine theme. 

I tucked into my stamp & Thicker stash, and embellished with a button or two. And of course, turned to my punches more than once for a circle or a bow. 

It took me some time to get it all together. And I remembered why I don't make mini books that much any more -- they take so long & I start to lose interest and zeal for the project. But I always love seeing them all put together. Scroll through for a quick recap of our girls weekend. I had a blast with these lovelies. Can't wait until February 16!

Oh, one more thing. I have to note that I did catch the misspelling in the title page. Working to fix it now!


And of course I didn't forget about the RAK winner! According to random.org it's commenter number 3. That would be you SamSam! I'm e-mailing you know for your address, so I can get these goodies off to you. If you haven't seen the e-mail, then please e-mail me at paperheart[dot]project[at]gmail[dot]com.

cheers & besos,