Scrapping in 2010

Thursday, December 31, 2009


Happy New Year's Eve!!

I can't believe this year is coming to a close. It hasn't been the best year. In fact it's been the most difficult year to date, for me at least. But I've learned a lot and I'm excited to see what's in store for 2010. There's no where to go but up, right?
Since this is a scrapping blog, I thought I'd take the time to map out some of my 2010 Goals (not resolutions) for my favorite creative outlet. Being the MBA that I am, I of course had to make sure that each of my goals are SMART.

S: Specific
M: Measurable
A: Achievable
R: Realistic
T: Time Conscious

Without out further adieu, here are my dreams, hopes and wishes ;) for 2010!
  1. Tackle my Europe/Asia Photos: Although this has seemed so daunting to me in the past, I have to get it done! These photos represent the best year of my life! What better way to celebrate them, than to scrapbook them! Each month, I'd like to work on a specific country, in order to not be too overwhelmed. By the end of 2010 I might not have every country tackled but I'll at least have made a significant dent in all of these amazing photos!
  2. Stay consistent with Urijah's Baby Album: I've been horribly lax with keeping up with the life and times of Urijah John! I'll scrapbook a page here and there but they're so varied and inconsistent. Entire months of his young life are missing! I'd like to start from the beginning and work my way up to the current. Each month, I'd like to create at least 2 layouts for all 3 (count 'em) of his scrapbooks.
  3. Incorporate new Scrapping Techniques: In 2009, I incorporated the use of mists, mini books, border punches and a personal die cutting machine, into my scrapping repertoire. In 2010 I'd like to also explore sewing on pages, embossing, and delving into the digi world, as resolutions for my technical abilities.
  4. Maintain and Enhance the Blog: I have a lot of new and exciting (at least for me) ideas for amping up this blog! You can expect project updates, tutorials, small RAKS and my biggest surprise yet. {Shh! It's under wraps until the New Year!} It isn't realistic for me to blog everyday, but I am bound and determined to post at least twice a week. I hope you'll be back to join in on the fun!
  5. Participate in a Scrapping Community: I am privileged to be part of an online community over at 2Ps. We're gearing up for the New Year and planning, in advance, the Young Scrappers swaps and crops. Every quarter we hope to do an ATC swap and once every 4 months, an online crop. I'd also like to participate in local crops, in an effort to meet new people in the scrapping community. I have my first crop in 6 years coming up next weekend. I'm bubbling with excitement! I hope to be able to join in a crop once a quarter as well.
  6. Budget! Budget! Budget! I'll be the first to admit that I went hog wild this year, with all of my scrapping purchases! I have enough supplies to sustain my scrapping as well as the scrapping of a small country! Inevitably, it's time to pull back the reins and focus more on the using than the purchasing. My goal is to only spend $50 a month, with 3 months alloted for a $100 spree. That's $750!! Which sounds like a lot of money, but I actually spent double that at 2Ps alone {Gulp!}, this past year =/ Yeah, it's definitely time for some tough love on my part.
Well, that's my small, but none the less easy, list of goals for scrapping in 2010. I'm excited about this upcoming year and for all of the wonderful opportunities to explore in my community, throughout the world, and within in myself.

Wishing you all a blessed and bountiful 2010!

xxbesos
j.leija

And He Scrapbooks Too!!

Friday, December 25, 2009

That's right ladies, check out the awesome page my boyfriend put together for our Christmas scrapbook! He actually got really into. I'm so proud of his first scrapbook page! Look how cute he looks cutting out the little houses, sticking everything down, and picking out letter stickers :)

He mainly used American Crafts for this page. And that title has to be my favorite part! Since we've both lived in Thailand, we both have the infamous "Same Same--But Different" t-shirts. His title is a play off of this. Love it! It's such a special thing for both of us.


xxbesos
j.leija

Merry Christmas


Merry Christmas 2009 for all of my fellow interwebbers! This is how I got crafty this blessed December day. Since we partake in festivities on Christmas Eve, it left for today to relax, eat some yummy food, watch some basketball, and scrapbook! We both got into the scrapbooking but more on that later.

I altered the cover of this amazing Wilson Jones recycled binder, to be used as our first Christmas album. I had my pick of gorgeous Christmas products this year. My favorite being the Making Memories Mistletoe line. I think I've used it for just about every Christmas project I've created this season. Can't get enough!

Currently, we have one page in here. And the best part?! I didn't make it...Matt did!


From me and Matt over at the Paper Heart Project we wish you and yours an amazing holiday season!

xxblessings and besos
j.leija

Paper Posies

Wednesday, December 16, 2009


I recently came across this photo of my Grandma and her sisters. I loved that they were all wearing solid tops. It left me a lot of room to play with color and was the launching point of this layout, which btw is 100% a scraplift from the lovely Aphra Dee's Party Girls layout. I loved the colors she used, the multiple patterned papers, and of course those gorgeous posies! It also didn't hurt that it's a relatively simple layout to replicate (once you make all those flowers!). I had to make 4! One for Nana and each of her sisters. I'm so happy with the result! Below is a tutorial on how to make those lovely posies.


Supplies
Patterned paper, flowers, brads, border punches, 2 1/2 in. cardstock circle, 1 1/2 in. cardstock circle, adhesive, paper piercer, scissors, distressing ink (optional)


  1. Use border punch to create a decorative border along one edge of a 12x12 sheet of patterned paper (not pictured)
  2. Cut strip down to 3/4 in. x 12 in. (not pictured)
  3. Use distress ink to tone down white side of patterned paper (optional, not pictured)
  4. Using an adhesive dispenser, apply adhesive down the length of the patterned paper strip
  5. Adhere one end of the patterned paper strip to 2 1/2 in. cardstock circle
  6. Begin folding strip in as you turn the circle in your hand (I typically fold about a thumbs length in)
  7. Continue around the entire circle
  8. Use border punch to create a decorative border along the 11 in edge of an 8 1/2 x 11 in. sheet of patterned paper (not pictured)
  9. Cut strip down to 3/4 in x 11 in. (not pictured)
  10. Use distress ink to tone down white side of patterned paper (optional, not pictured)
  11. Using an adhesive dispenser, apply adhesive down the length of the patterned paper strip
  12. Adhere one end of the patterned paper stripe to the 2 1/2 in. cardstock circle, inside the first patterned paper folds

  1. Begin folding strip in as you turn the circle in your hand (I typically fold about a thumbs length in)
  2. Continue around the entire circle
  3. Pierce cardstock in the center of the circle
  4. Load 2 flowers onto brad, thread through paper and spread brad prongs

  1. Use border punch to create a decorative border along one edge of a 12x12 sheet of patterned paper (not pictured)
  2. Cut strip down to 3/4 in. x 12 in. (not pictured)
  3. Use distress ink to tone down white side of patterned paper (optional, not pictured)
  4. Using an adhesive dispenser, apply adhesive down the length of the patterned paper strip
  5. Adhere one end of the patterned paper strip to 2 1/2 in. cardstock circle
  6. Begin folding strip in as you turn the circle in your hand (I typically fold about a thumbs length in)
  7. Continue around the entire circle
  8. Adhere scallop circle to the center
  9. Pierce paper in center of the circle
  10. Finish with brad
I made a few extra. The first 2 people to post replies (include your e-mail) will receive either one or the other of these cute paper posies.

xxbesos
j.leija

Brag Book

Tuesday, December 15, 2009


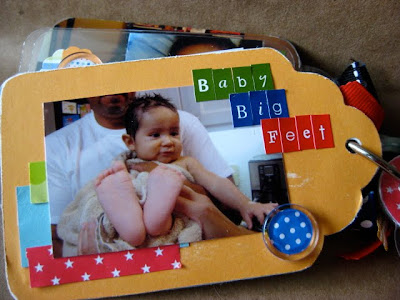
Of course I'm back to scrapbooking my favorite subject, my little nephew Urijah! And of course, I had to spread the scrapbook cheer :) I created this mini acrylic album as a brag book for my mama to carry around in her purse. The last one wasn't as sturdy, so she was scared it would fall apart. I'm hoping this one will be a bit more hardy.

All the patterned paper is Making Memories Giggle Kids line. I used a ton of border punches as well, Fiskar's Upper Crest and Threading Water, Martha Stewart's Loop, and EK Success's Spiral Notebook. I also sanded the edges of some of the pages, just to give it a handled feel. Hopefully, it will be looked at!


xxbesos
j.leija

Box in a Box

Saturday, December 12, 2009


For the longest time, I had a huge mental block about what to get/make for Matt. After an anniversary, his birthday and now Christmas bang bang bang in a row, I must admit I didn't quite know what to make for him. Then inspiration struck! I've always wanted to give a box within a box within a box present and here was my golden opportunity.

The smallest box is 4x4 and contains a special deck of playing cards I had made. Matt and I are big Gin players. We've pretty much worn out our tired old deck of playing cards. So using my love of photographs and our mutual affection for cards, I combined the two and had a deck with our photo on it created thanks to Kodak.com! The accompanying card clearly took inspiration from our deck. I shredded the rest of the cards and used it as a sort of confetti nest in the box. [Pictured below]


The second box was full of Airheads, his favorite candy. I was trying to think of some creative way to make a candy card and Christina Aguilera's Candyman song was stuck in my head on repeat! Since Matt's a big fan to begin with, I just figured I'd use her for the card as well. Cutting the patterned paper to alternate and have a slight curve was no easy task. I had to number and plot out everything before I stuck it down. I was so happy that the Basic Grey Eskimo Kisses line coordinated so beautifully with the photo! I added Diamond Glaze to all of the joints for a more cohesive candy-esque look. Added the Eskimo Kisses chipboard embellishments and an American Crafts Home Glitter Embellishment and viola!


The last card was lemon inspired because lemons are one of Matt's and my couple-y things. When I travel, I crave salt like nobody's business! So before we took the Eurostar back to London, we stopped at a quaint Parisian grocery store, not too far from the Eiffel Tower, and purchased a lemon and some salt. He was totally disgusted/flabbergasted that I could sit there and eat a lemon like an orange and he's teased me about it ever since. Now I have the poor boy hooked on lemons and he makes sure to have them around whenever I visit. So the final box is filled with vase filler lemons and Lemonhead candy. I dressed up the lemons by typing out a quick "I love you because..." sentiment and tied them around each lemon with the baker's twine.

Each box is going to be wrapped and nested in the next biggest box. And each box contains one of the handmade cards I created, along with the appropriate "gift". It's something small and silly but I hope it makes him smile none the less!

xxbesos
j.leija

Santa's Workshop


That's what my room has felt like, these last few weeks. As the holiday rapidly approaches, I find myself scrabbling to keep up with the plethora of cards, tags, and gifts, I've happily decided to undertake this season.

It all started with this idea for Christmas cards. I know this is going to be a difficult Christmas for all of the Leija's. It's the first Christmas we've had without Uncle Joe, who went to be with the Lord this past September. I was in charge of the memory boards for his funeral and it was then that I realized how valuable my beloved hobby is. How photographs are incredibly important in the preservation of our cherished memories. Thus, I wanted all of my family members, down to my very littlest cousin to have at least one photo of our loving uncle, father, brother, son and grandfather. And here is the result. I included the same poem I used for Nana's Christmas present as well as a favorite Christmas photo of him.


My next project were all of the little gift tags, I want to include with my presents. I had the idea to make them layered and dangly and love how they turned out! They were incredibly time consuming but definitely worth it. I'll start my tutorial on how to make these little buggers from the bottom tag up.


  1. Using my Slice, I die-cut a 4 in. tag out of Kraft cardstock using the Vintage Memories Design Card
  2. Then, also using my Slice, I die-cut the word "joy" at 1 1/2 in. directly out of the tag, using the Mistletoe Design Card; and also being mindful of the placement of the word. I had to play a bit with positioning to get this in the general area of where I wanted the cut out to be. Save the cut out from the letter "O".
  3. Next, I cut a 1 1/2 x 1 1/2 in square to back the word "joy" from behind. I choose Making Memories Argyle Mistletoe patterned paper bc it's decorative on both sides. I adhered it to the back of the tag and affixed the cut out from the letter "O" to the the red paper.
  4. Playing with my left over cut-out, I sprayed the word "joy" with Emerald Metallic Maya Mist and set it aside to dry.
  5. I typed out the phrase "Do not open until..." and arranged the text into the shape of a Christmas tree.
  6. Using my Slice again, I cut out a mini tag from green cardstock and printed the text directly onto the tag. To decorate, with a gold paint pen, I added a star topper and the trunk of the tree. Finally, I inked the edges with gold stamping ink.
  7. For the next layer, I again turned to my trusty Slice. I cut out a 2 in. ornament using the Mistletoe Design Card. Next, I distressed the edges with Tim Holtz's Vintage Photo distressing ink and stamped a red calendar with chalk ink and American Craft's 2 in. circle calendar stamp. I circled the word "DEC" and the number "25".
  8. The easiest part were these gorgeous snowflakes cut from red cardstock, using the Mistletoe Design Card and the Slice.
  9. Finally, I tied them all together with Martha Stewart's Holiday Baking Twine and hand wrote "To" and "From" on the large tag.


These smaller tags were an after thought, but ended up being some of my favorite creations!
  1. I cut up a manila folder into 2 in. x 3 1/2 in. rectangles. Hole punched a circle at the top and cut down two of the sides to create the look of a tag. Then, I distressed the edges using Tim Hotlz's Distress Ink in Vintage Photo and an ink blending tool.
  2. Using the cut-out sheet from the previous gift tags, I positioned it over the manila tags and covered off the rest. I sprayed the Emerald Metallic Maya Mist and the Red Maya Mist over the cut out and then removed it to reveal the shape of snowflake.
  3. Next, I cut out the shape of a gingerbread man using the Slice and the Mistletoe Design Card.
  4. I threaded the two tags, along with a button, together using Martha Stewart's Holiday Baking Twine and tied it off with a bow

I had a lot of fun creating all of these Christmas goodies! So much fun, in fact, I made too many =) To get everyone into the holiday spirit and to wish you all a Merry Christmas, the first 5 people to comment on this blog entry will receive one of the Christmas tags showcased above. Please include your e-mail address in your comment so I can contact you for address details. Wishing you all mil blessings and besos!

xxbesos
j.leija

Lil Boy Frame

Saturday, December 5, 2009


This could possibly be my most favorite project that I've ever created! It was super simple and so quick to put together. I mean, this fabulous Making Memories product line did all of the work for me. I made it as Christin's Christmas present but I'm seriously thinking about keeping it...or at least making another one!


xxbesos
j.leija

Playing Catch Up


Before I left for Ohio, I was hastily trying to finish my latest album of Matt's visit to Texas. Unfortunately, it didn't get done. Only because 1) Urijah came for a visit and 2) I was on my death bed before I left. Excuses, excuses! I know! I know! But I'm working on it now and hopefully will be done soon.

I love how this layout of Mission San Jose turned out. Busted out my most favorite paper line ever, Basic Grey's Marrakech collection. It went so well with the earthy vintage feel of the missions. Oh, and this was also my first experiment with my new little photo printer! I had a blast printing out all of these tiny little pictures.


Oh this layout...{{sigh}} What can I say? I liked it when it was plain, then I felt the need to "dress it up" and I'm not happy with the results. I kinda feel like I ruined a good thing. Well, there's not going back now. I'll have to live with it I suppose but I don't have to be happy about it.


The first of our ACL layouts! Hoorah! I cut up the little program they gave us and used it for the title. These were probably some of my favorite pics of Matt and I that weekend. And can I mention the spectacular weather! If only it would have lasted...


Last but certainly not least was mine and Claire's reunion. Since we both moved away from Texas at the same time, we hadn't actually been back in the same city at the same time in over 2 years. It was so good to see her! Even for that brief amount of time. Claire bear I'm coming to see you first chance I get!

xxbesos
j.leija

Urijah Update


So it's been awhile since I created a layout of my favorite little guy! His mama has graciously been sending us nearly weekly photo e-mails. We're always so excited to receive them and literally crowd around the computer to view them 1, 2, sometimes 3 times. He's just the most beautiful thing to us. It's hard not to see my brother's face reflected back in his cherubic baby cheeks!

These were the photos she sent us from Halloween. We were all very excited that he was a little "kelekon". {You know there's a story coming...} So when Johnny was little he went to the doctor and after his visit he got to pick out a little toy. Standard practice (pun intended) in a pediatrician's office. One day, he came home with a little pink plastic skeleton which he rather adorably called his kelekon. It's something we've teased him about over the years. Along with his infamous "I'm scared of the baths {bats}" quote.

Needless to say, it was perfection that Christin chose this to be his Halloween costume. It also doesn't hurt that my mother has a large affinity for skulls and pirate contraband. You should see the beach house! We even have a pirate ship and a glass bottle of vodka shaped like a skull sitting on top of our refrigerator. Not to mention the pirate flag they cheerfully hoist, out back on the canal. She even got my dad a pair of skull and bone flip flops! It's a sick obsession really but we love her for it anyhow. Her contribution was the pirate beanie Urijah's sporting. Sadly, it got cropped out in the printing. But he definitely was the cutest little kelekon you ever did see!


Another obsession of mama's and mine is Urijah's baby clothes. We go hog wild in our local Target, picking out his little outfits. He's growing so fast! So there you have our excuse for all of his new clothes ;) This has to be one of our favorites. I mean, how can you beat footie onesies?! You just can't! And especially on our cute little trucker! He also looks great in bright colors and this outfit was nothing if not bright. We especially loved the little button butt on this onesie. I had to memorialize it in the best way possible, with a scrapbook page of course!

Buttons where the theme, so I made sure to include plenty of 'em. I hand stitched around the edges to achieve the "patch" look of his outfit. And using inspiration from a challenge over at 2Ps, I journaled in the form of a list. It came together rather quickly and I'm happy with the result and proud that I was able to add a few more pages to Urijah's scrapbook. Poor child is going to be scrapbooked to within an inch of his life...

xxbesos
j.leija

December to Remember


We shall see if it is. It's definitely going to be a different Christmas. Its our first holiday without Uncle Joe. I'm not going to get all mopey and sad because I have to remember that he's no longer suffering. Which is truly the most comforting part of knowing he's no longer with us. It's still hasn't hit me though. That he won't make his yearly appearance, give everyone a hug and then be out the door. I'm so thankful that I caught him before he left 2 years ago. We took one of the few photos I have, of just the two of us.

But anyway, I made this memorial page as a Christmas present for my Nana. I know this is going to be so difficult for her especially. They were best friends. So with Nana in mind, I made sure to add as much red and bling as I could. Prima truly did all of the work for me. Finding that poinsettia really set the tone for this layout and inspired the rest of the design. I also simply adore MM's Mistletoe line. I used it in about every holiday craft this year, including my Christmas cards. I wish everyone a safe and wonderful holiday season this year!

xxbesos
j.leija

Rush!

Sunday, November 15, 2009


Nope, not the band Rush. (And I really need to quit re-watching I Love You, Man!) More like, I only have x amount of days to finish this thing before I leave for Ohio! I'm pushing myself to scrap all of my birthday/Matt's last visit to Texas photos. Just so I can show his mom and grandmas what it is that I've been doing all of these unemployed days! It's a simple album but I'm loving how each of these has turned out.
xxbesos
j.leija

Christmas Come Early

Monday, November 9, 2009


I got to work early this year! I wanted to make sure I had time to get all of the products I wanted and that they came out great! Plus, I had to make 40 of them! Nearly everything is Making Memories, from this years' Mistletoe line. I adore this paper and was so glad to find it at Scrapbook 911, my now favorite local scrapbook store. Don't even get me started on what's going on over at the debunked Scrapbook Heaven. I miss the good old days. When I was 16 and had my first job there. It was the best first job I could have ever asked for. Too bad things changed so drastically under the new management. But that's neither here nor there. {{Sigh}}

And this is a special one for my dear friend Sarah. Had to commemorate our last Christmas in Lombok and that she's spending this Christmas in Australia. This was an idea I had in my head ever since we were in Lombok. Once I found this amazing Jolee's palm tree, I had to use it! Happy early Christmas everyone!

xxbesos
j.leija

Challenges

Sunday, November 1, 2009


In my own personal life, 2009 has met with plenty of challenges. But I'm not going to delve into that right now. This blog is about a good kind of challenge, and what else could it be but a scrapbooking challenge!!

I'm hosting 4 challenges this month, over at Twopeasinabucket.com. Three are part of the {Young Scrappers} thread and one is a Twilight Challenge in honor of this month's premiere of New Moon!

I'm going to take a second here to plug 2Ps (as its faithful band of followers have aptly dubbed it), which is, in my opinion, the best scrapbooking site on the internet. Not only can you shop there (and believe me I do) but they have an amazing forum for meeting fellow scrapbookers. I'm an active member on the General Scrapping message board and have found a niche for myself on the aforementioned Young Scrappers hread. 2Ps also hosts fun events such as Stamptoberfest, (which I recently participated in) National Scrapbook Day, as well as Weekly Challenges and various classes. All with the chance for awesome prizes and 2Ps gift certificates. So in honor of 2Ps and as a way to give back to this awesome website, I opted to host a few challenges.

The first is the Just Scrap! Challenge for November's Young Scrappers thread. For the chance to win a $10 2Ps gift certificate, simply scrap to your hearts content. Anything and everything is eligible to win, as long as you check the Young Scrappers challenge box during the uploading process.

I'm also hosting 2 mini-challenges for the chance to win a $5 2Ps gift certificate. Same rules apply, be sure to check the appropriate challenge box during the 4th step of the uploading process.


November 1-15 is a Thanksgiving/Gratitude challenge. I created this layout of last years' Thanksgiving, primarily using Making Memories Autumn Leaves collection. Of course, this memorializes all of our MBA buffet goings. And actually catches all of us in nearly 1 photo.


November 15-30 is a Holiday challenge and a chance for everyone to get caught up on their holiday cards and layouts. I created this layout of last years Christmas. Sarah and I were traveling at the time. We spent it on a beach in Lombok, Indonesia, soaking up some sun and immersing ourselves in the Twilight series.

Which brings me to my last challenge. A general Twilight Challenge in honor of New Moon hitting theaters on November 20. I'm such a Twilight geek, I had to host this mini-challenge. Sadly, I don't have my own Twilight layout to display but hopefully, I'll finish it soon.

So that's my grand contribution to the scrapbooking world this week. If you aren't already, be sure to check out 2Ps and participate in one of my challenges!

xxbesos
j.leija