

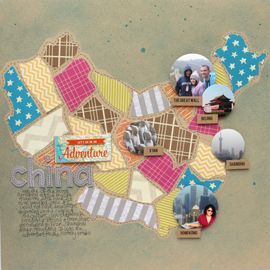
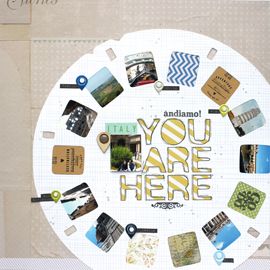
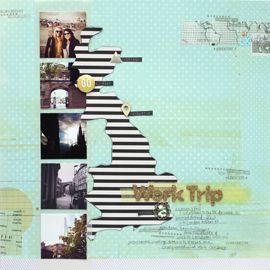
I recently came across this photo of my Grandma and her sisters. I loved that they were all wearing solid tops. It left me a lot of room to play with color and was the launching point of this layout, which btw is 100% a scraplift from the lovely Aphra Dee's Party Girls layout. I loved the colors she used, the multiple patterned papers, and of course those gorgeous posies! It also didn't hurt that it's a relatively simple layout to replicate (once you make all those flowers!). I had to make 4! One for Nana and each of her sisters. I'm so happy with the result! Below is a tutorial on how to make those lovely posies.

Supplies
Patterned paper, flowers, brads, border punches, 2 1/2 in. cardstock circle, 1 1/2 in. cardstock circle, adhesive, paper piercer, scissors, distressing ink (optional)

- Use border punch to create a decorative border along one edge of a 12x12 sheet of patterned paper (not pictured)
- Cut strip down to 3/4 in. x 12 in. (not pictured)
- Use distress ink to tone down white side of patterned paper (optional, not pictured)
- Using an adhesive dispenser, apply adhesive down the length of the patterned paper strip
- Adhere one end of the patterned paper strip to 2 1/2 in. cardstock circle
- Begin folding strip in as you turn the circle in your hand (I typically fold about a thumbs length in)
- Continue around the entire circle
- Use border punch to create a decorative border along the 11 in edge of an 8 1/2 x 11 in. sheet of patterned paper (not pictured)
- Cut strip down to 3/4 in x 11 in. (not pictured)
- Use distress ink to tone down white side of patterned paper (optional, not pictured)
- Using an adhesive dispenser, apply adhesive down the length of the patterned paper strip
- Adhere one end of the patterned paper stripe to the 2 1/2 in. cardstock circle, inside the first patterned paper folds

- Begin folding strip in as you turn the circle in your hand (I typically fold about a thumbs length in)
- Continue around the entire circle
- Pierce cardstock in the center of the circle
- Load 2 flowers onto brad, thread through paper and spread brad prongs

- Use border punch to create a decorative border along one edge of a 12x12 sheet of patterned paper (not pictured)
- Cut strip down to 3/4 in. x 12 in. (not pictured)
- Use distress ink to tone down white side of patterned paper (optional, not pictured)
- Using an adhesive dispenser, apply adhesive down the length of the patterned paper strip
- Adhere one end of the patterned paper strip to 2 1/2 in. cardstock circle
- Begin folding strip in as you turn the circle in your hand (I typically fold about a thumbs length in)
- Continue around the entire circle
- Adhere scallop circle to the center
- Pierce paper in center of the circle
- Finish with brad
xxbesos
j.leija


Super cute! Thanks for the easy to understand directions!!!
ReplyDeleteI need something to make for a Secret Santa swap. These are PERFECT! Thank you so much for taking the time to post pictures and instructions.
ReplyDelete~Erika
Thanks for the tutorial, what a great flower.
ReplyDelete