
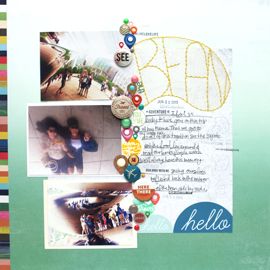
Sorry for being MIA these last few days, I was over in Austin playing with this girl:
 My bestie, Tara Fay! I love her to pieces :) We went to celebrate her 27th year of awesomeness, with a little karaoke and some bowling. Needless to say it was an awesome 24 hours of fun. But we're old and now everyone is tired.
And now I'm home to write about her gifts.
Tara has received a lot of my handmade creations, so it's always a challenge to think of something new and innovative. I tend to go overboard on these things and try to think of themes.
One year, when I was poor and unemployed, I baked her cupcakes and personalized the cupcake toppers. I also made her a cupcake mini album and a cupcake card.
Last year, I spruced up some moleskine journals for her (she's a writer) all with the theme of achieve.
This years theme was all about the number 5.

 It's my attempt at humor :D And actually a really quick and easy card to make.
It all started with that book in the middle. I found it at Paper Source (along with some other scrappy goodies) and instantly had my theme for this year.
Now, to know a bit about Tara, you have to know that she's a planner, she's a list maker, she's future thinking and goal-oriented. That's my girl to a T (hehe!) So when I came across this book, on a second pass through Paper Source, I knew it would be perfect for her.
It's all about where you're going to be in 5 years. It's a workbook of sorts that focuses on your values and goals, etc. Spot on for my favorite life planner.
So I came home and made this silly card using a stencil purchased from Paper Source (which btw I could not love more!) and some Maya Mists. (I'm seriously lacking in red Mister Hueys...)
 It's my attempt at humor :D And actually a really quick and easy card to make.
I sprayed it, used my Slice to cut the circle and the 5, printed out the type and heat embossed the 27 on the inside.
Simples!


Then I got to think about it. Tara and I have known each other for several years now, but we really didn't start hanging out on a regular basis until 2006...5 years ago!
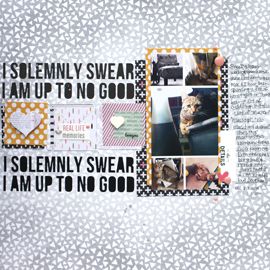
So I had to make a mini! And since I've just added a new type of my album binding to my repertoire, I knew it could be quick and easy. KP, I hope I made you proud :)
 I used a Hambly overlay for the cover, and cut another 5 with my Slice.
  Then I busted out the stencil again and hit with Red and Coral Maya mists.
 And then I got to playing. The theme was all numbers, so I pulled together some number paper, an SC number stamp etc.
 And I added the date to all of my photos, picked one from each year of our friendship.
 Played with some shipping tags, mist and stamps.
 Added some blue which is quite an accomplishment for me since I don't really use blue very often, but I love how this turned out! These are my favorite 2 pages :)
 And I'm loving my white embossing powder!
 Ran out of room for some journaling, so I added in a shipping tag for some extra space.
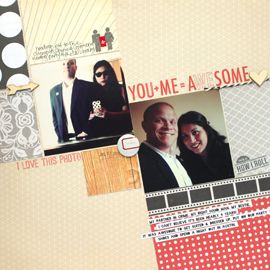
 Have to add that this is my absolute favorite photo of me and T. It's just so us it isn't even funny!
 Misted the tag using Warm Calico Mister Huey.
 And finished the album with a photo form New Years' Eve 2010!
  I wouldn't have thought to add a back to the mini, if it wasn't for the Fabulous Fabrips class, but I love how it literally helps close the book on the mini. I'll never forgo this potentially wasted space again!
Oh, and I have to add that the majority of this kit was made using the leftovers from the CKC class! I only added a few elements and papers and of course used my own stamps and Mister Hueys. So keep that in mind if you're thinking of taking the class :)
I just have to end on this note. T Fay, I love you to pieces! Never change, always keeping striving for improvement in yourself, in me, in the world. You are one of the most amazing people I know! Love you girlie :)
xxbesos


this is creative beyond words. i love it all so much :) i am SUPER theme-y as well and enjoy every single bit of the number bits & bobs.
ReplyDeletesuch an amazing, sweet set of gifts Jamie Cakes!
XOXO
Leigh